West CoastReefers
🏠Home
💬Community Forums
👋Introductions🌺Coral🐠Fish🏵️Anemones & Clownfish⚙️Equipment🧪Water Chemistry🦀General🔧DIY📷Photography🌱Beginner Help🏪Local Fish Stores🤝Sponsors⭐Vendor Reviews🛋️Lounge💡Site Feedback
📅Events🏆Contests🐡Builds🐠Marketplace🔨Auctions🏗️Stand BuilderNEW🧮Calculators👥Members
→Sign in
AboutTerms & rulesPrivacyContact
🏠Home💬Forums🐠Market🔨Auctions→Sign in
+ New threadSign in
About·Nonprofit·Donate·Giveaway winners·Terms & rules·Privacy policy·Contact·info@westcoastreefers.com
© 2026 West Coast Reefers
IM25 Lagoon
25 galMixed Reef·by @mescobar·started Aug 22

IM25 Lagoon

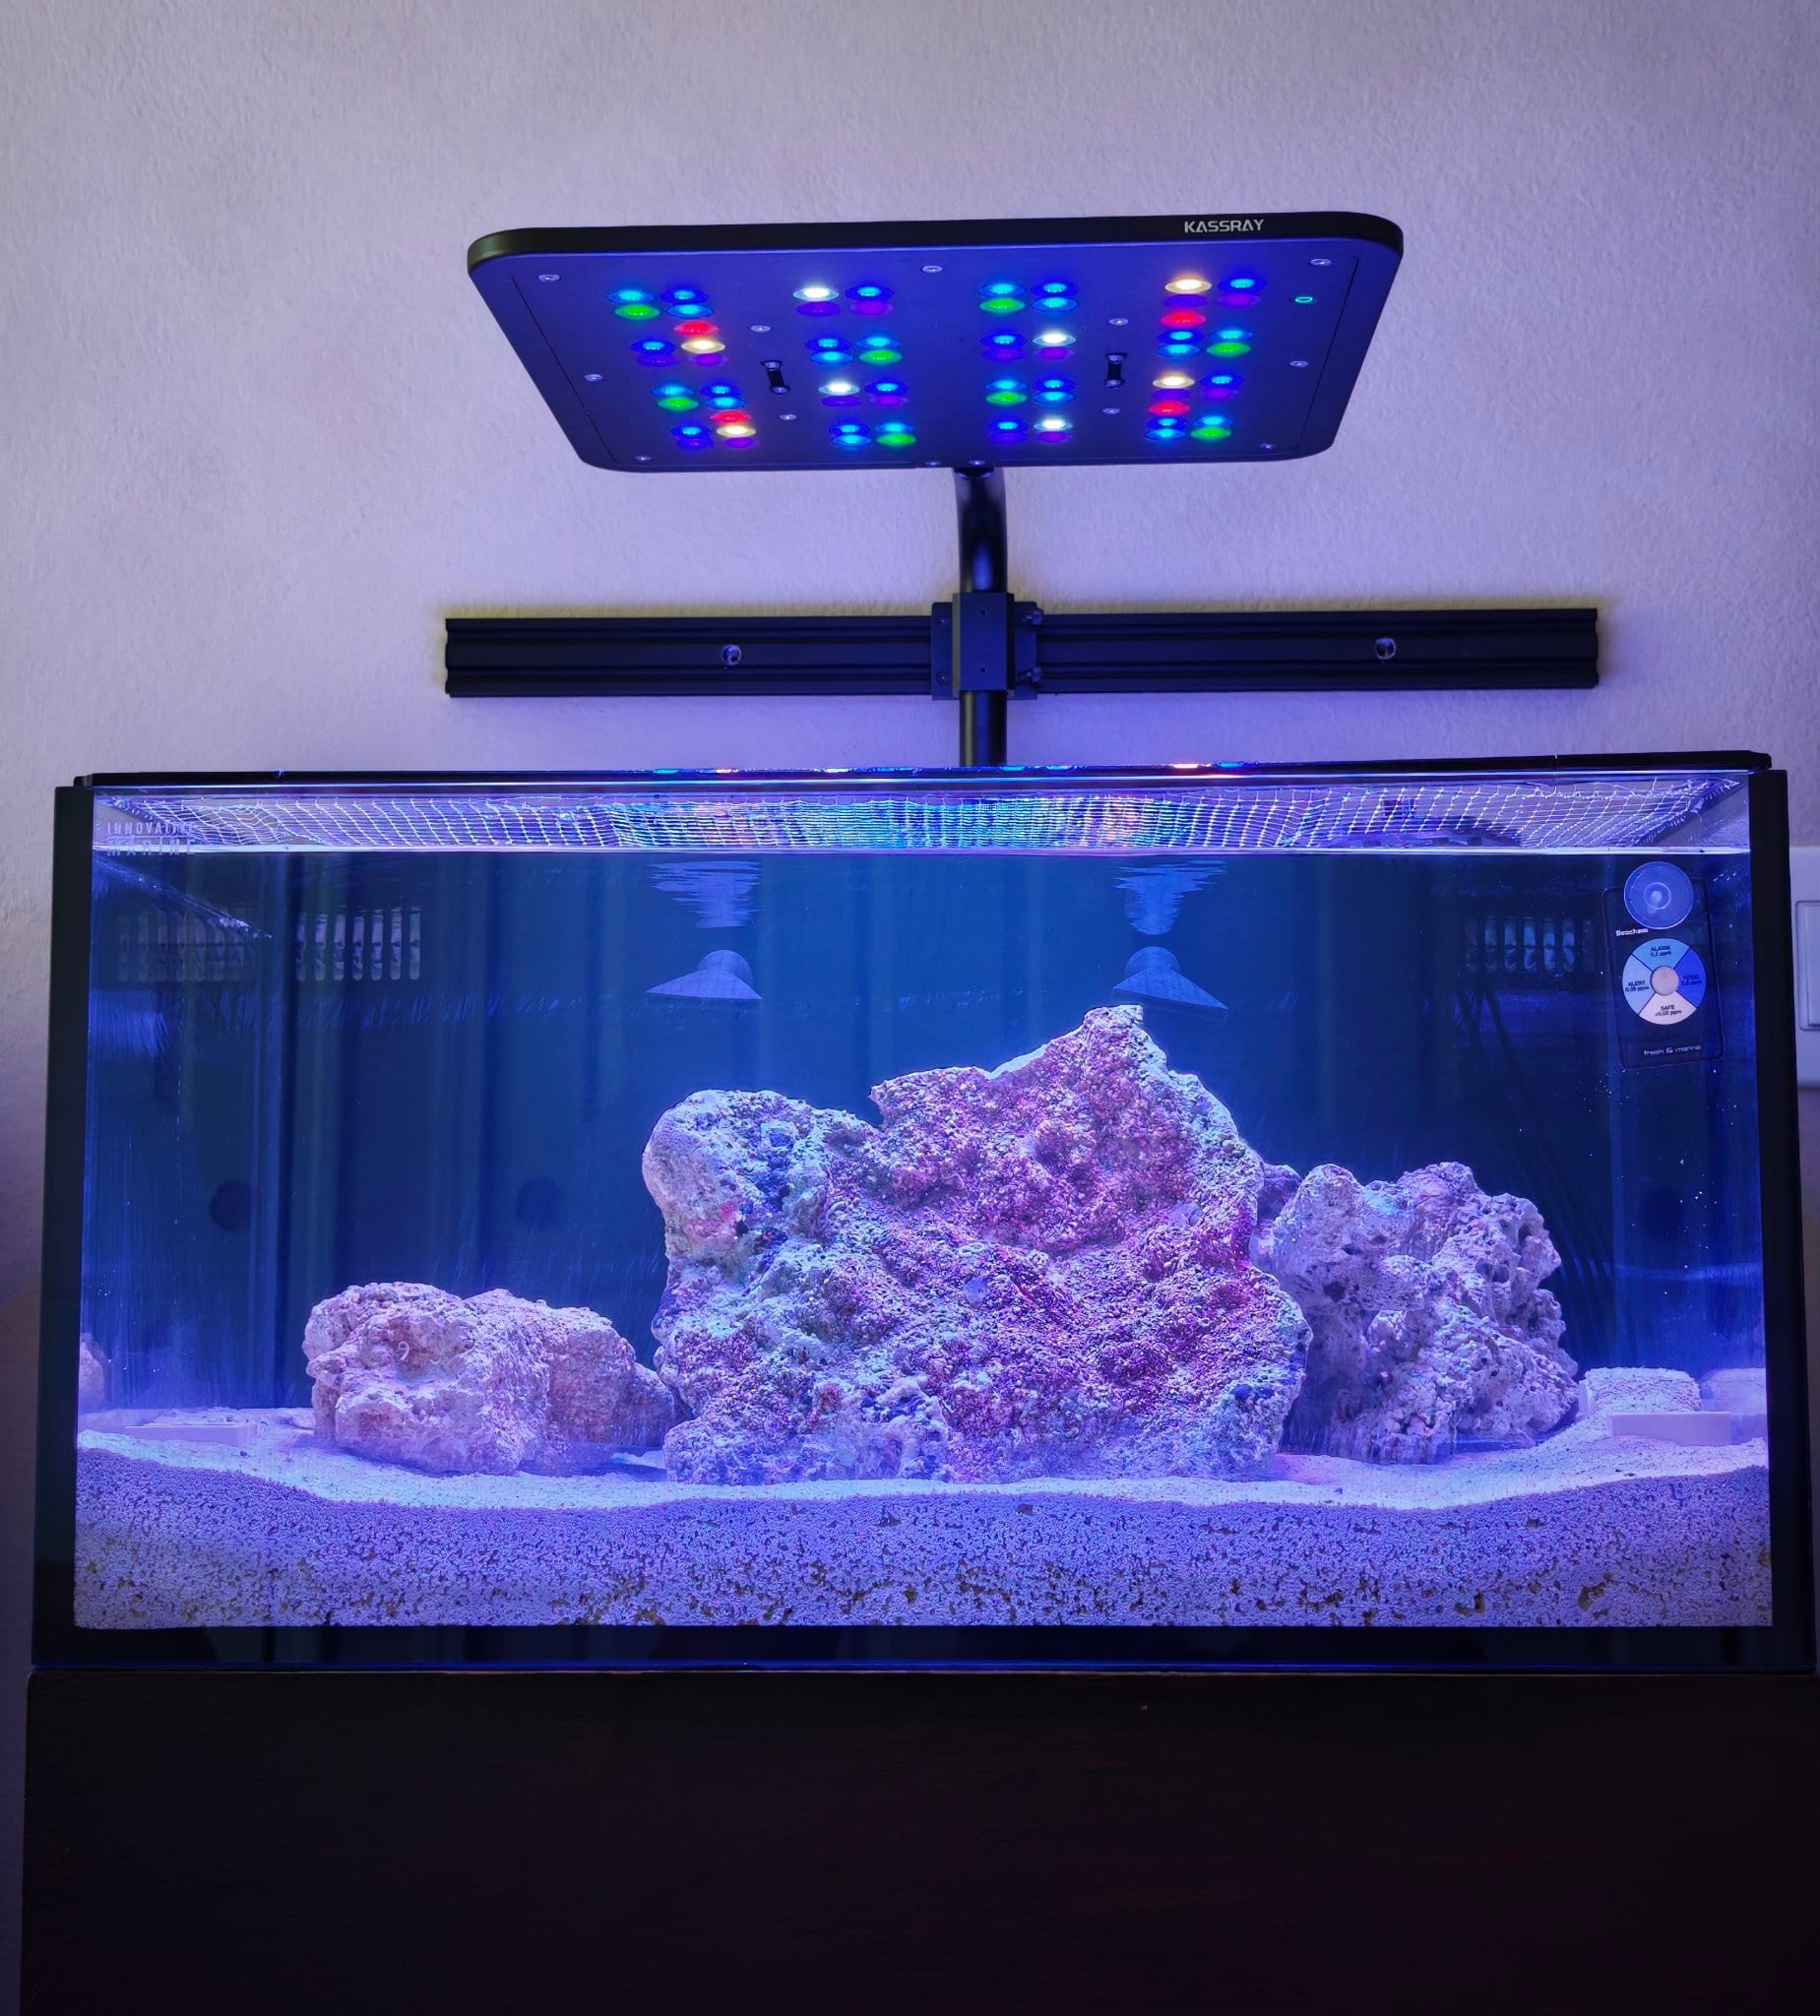
It all started one morning when I looked into my Biocube 16G and saw my paired clownfish yearning for a larger home. After some consideration, I decided to give them a larger space, a IM25 lagoon. The goal was to have the tank setup before RAP, more real estate for my inevitable purchases... Here we are a week after, better late than never. I'm glad I was able to take my time and prevent redoing work. The tank got wet this week, and I'll be transferring the livestock this weekend (and maybe get some more fish). Here's the journey so far:
3 followers
Tank specs
Size
25 gal
Type
Mixed Reef
Dimensions
n/a
Filtration
AIO
Lighting
Kassray T120
Skimmer
n/a
Flow
n/a
Dosing
AFR
Controller
Hydros X3
Livestock

n/a

Goals

mixed reef lagoon tank with softies, LPS, macros and pipefish.

Comments (22)

Page 1 of 2Jump to newest ↓
12Next →
  1. @mescobar
    SCRM😎 Cool Kids🌸Polyp WhispererOwner
    Joined Aug 202629 posts155 pts
★5.0(1)
🔧 Build Contributor
Sep 4
The tank arrived mid-August and sat around for a while trying to figure out what stand I would pair with the tank. I looked on marketplace for some stands I could use, and even entertained the idea of using and retrofitting an IKEA kitchen cabinet stand. Eventually, I called around and was able to find a premade plywood stand to pair perfectly with the IM25 dimensions. A couple challenges with the stand:
  1. It was located in West Covina and wasn't going to fit in my sedan. Thankfully a fellow reefer and coral vendor helped transport the stand, a true godsend.
  2. The stand was raw plywood that had been assembled but not sanded or finished. I had unknowingly signed up for a woodworking project. Time to brush up on my middle school wood working skills.
Here's a few photos to give you an idea of the initial condition of the stand I'd be working with.
▲ 0
  • @mescobar
    SCRM😎 Cool Kids🌸Polyp WhispererOwner
    Joined Aug 202629 posts155 pts★5.0(1)
    🔧 Build Contributor
    Sep 4
    The first thing to do start sanding... just had to buy an orbital sander and the proper sandpaper first. After a couple of hours sanding (and fielding a noise complaint from a neighbor) we had a proper canvas to play with.
    ▲ 0
  • @mescobar
    SCRM😎 Cool Kids🌸Polyp WhispererOwner
    Joined Aug 202629 posts155 pts★5.0(1)
    🔧 Build Contributor
    Sep 4
    Once sanding was complete, it was time to stain and seal. I wanted to go with a walnut stain and oil based urethane. T-minus 5-days until RAP and I naively thought I would have this stand done by Friday. I hadn't realized the stain would take 48hrs to dry and each coat of urethane to take 24hrs to dry. I had hoped that the +90 degree heat would have helped expedite the drying, I'm sure it did, but not enough to meet the tight timeline. Working on the stand also required quite a lot sweat, more than I would have liked lol Here's what the stand looked like after the coat of stain. The stain came out much darker than I would have liked, more like a paint. I really should have used the rag method (as shown on the bottom). Lesson learned the hard way, next time we'll do it right lol
    ▲ 0
  • @mescobar
    SCRM😎 Cool Kids🌸Polyp WhispererOwner
    Joined Aug 202629 posts155 pts★5.0(1)
    🔧 Build Contributor
    Sep 4
    T-minus 2-days until RAP the stain was dry and it was time to seal with urethane. It's looking unlikely that we're going to be able to apply 3/4 coats of urethane by the time the weekend ends. We'll try anyways... No time to apply urethane to each side and let level/dry on its own, we had to optimize. This meant doing all the exposed inner/outer sides at once. And applying thin coats to prevent dripping the best we could. As much as I tried, the last coat was applied on Saturday morning the first day of RAP. I ended up doing 4 coats on the outside and 3 coats on the inside.
    ▲ 0
  • @mescobar
    SCRM😎 Cool Kids🌸Polyp WhispererOwner
    Joined Aug 202629 posts155 pts★5.0(1)
    🔧 Build Contributor
    Sep 4
    While we waited for paint to dry there was still much to do surrounding the tank. One of the tasks was building a mesh LID for the tank. I could have bought the lid from IM for $60, but why buy, when I could just spend $30 on materials and make a worse version myself 🤪 I set out to 3D print the individual pieces of the frame and feeding port. Cut out some mesh netting and use window spline and super glue to secure netting to the assembled frame. Then secured the feeding port via nylon bolts and nuts, and used an x-acto knife to cut out the feeding hole portion. Here's what the final result looked like:
    ▲ 0
  • @mescobar
    SCRM😎 Cool Kids🌸Polyp WhispererOwner
    Joined Aug 202629 posts155 pts★5.0(1)
    🔧 Build Contributor
    Sep 4
    Another problem I set out to solve with this iteration of the tank was that of my pistol shrimp. In the old nano, the pistol shrimp was quite elusive. I'd only ever see him once in a blue moon, although I would heard his snap everyday or so. I wanted to create an environment where I could potentially observe and enjoy the pistol shrimp more often. Surely the pistol shrimp would appreciate an artificially made cave/tunnel. It would save him so much time, effort, and energy. And it sure would be cool if that tunnel was pressed alongside the glass, such that we could see exactly where the shrimp is at all times. It was time to fire up the 3D printer once more and print two tunnel systems for each side of the tank. If the shrimp didn't like one of the caves, it could always move and migrate to the other (hopefully). This time we used cream colored PETG filament to better match the color of the fiji pink sand going into the tank. Even went the extra step of doing reefs and crafts, by gluing sand to the top of the tunnels to preserve a natural looking sand surface. Here's what the tunnels looked like while prepping and what the final product in the tank looks like.
    ▲ 0
  • @mescobar
    SCRM😎 Cool Kids🌸Polyp WhispererOwner
    Joined Aug 202629 posts155 pts★5.0(1)
    🔧 Build Contributor
    Sep 4
    T-plus 1-day post RAP and the tank is ready to be setup. The biocube has been moved to a temporary location and the new stand and tank are in place. Time to load the sand, tunnels, rocks, and get this tank wet. I had bleached some old rock from a previous build and cured it with some bio-media from my main display tank's sump, this is the rock that should help drive the ammonia cycle. Some of this rock is just temporary until I transfer rock from the old system into this system. I also picked up some pukani rock from RAP, seen on the right side of the tank.
    ▲ 0
  • @mescobar
    SCRM😎 Cool Kids🌸Polyp WhispererOwner
    Joined Aug 202629 posts155 pts★5.0(1)
    🔧 Build Contributor
    Sep 4
    T-plus 4-days post RAP and it was time to get some more of the life support systems in place. Getting the Hydros controller, powerbar, powerstrip, inkbird, doser, ato, and eventually emergency bubbler in place. We'll even be nice to our future selves and use cable ties and adhesive clips to help manage the cables and probes in an organized fashion. To be extra cautious we'll mount the equipment onto the stand wall to prevent any possible saltwater damage from leaks or spills.
    ▲ 0
  • @mescobar
    SCRM😎 Cool Kids🌸Polyp WhispererOwner
    Joined Aug 202629 posts155 pts★5.0(1)
    🔧 Build Contributor
    Sep 5
    At this point we have just about everything setup, everything except one of the most critical pieces of reefing equipment... the lights. For lights we went with a DTC (direct from china) light, the Kassray T120 (the ATI Straton X clone). I was able to pick this light up used from a fellow hobbyist in the area (woohoo). No 2-week shipping time, and no big beautiful tariffs to pay. One problem though, this light panel is made of metal, and it's a beefy boi at about 7.5 lbs... The light came with a universal mounting arm with a 4-inch by 2-inch U-mount bracket, but I'd be crazy to mount this light directly onto the 8mm IM back glass, right? I didn't want to take my chances, so I had to devise a solution that could leverage the universal arm the best I could. After doing some digging on other reefing forums for mounting solutions, all answers led me to using extruded aluminum (aka adult legos). So I bought some 2040 and drilled pilot holes to mount the 24" rail to the wall studs to act as a bridge. I then had to figure out how to mount the mounting arm pipe fitting to the 2040. Again, 3D printer to the rescue. I designed an adapter to mount the pipe fitting via M3 screws and the adapter to the 2040 via M5 bolts and t-nuts.
    ▲ 0
  • @mescobar
    SCRM😎 Cool Kids🌸Polyp WhispererOwner
    Joined Aug 202629 posts155 pts★5.0(1)
    🔧 Build Contributor
    Sep 5
    After doing some more drilling to the 2040, it was time to mount this bad boy to wall. Just a couple modifications to the adapter needed; add 2 more m5 t-nut holes for 2040 support, and deepen the m5 head depth to keep the bolts from protruding onto the pipe fitting face plate.
    ▲ 0
  • @joeoliver
    SCRM😎 Cool Kids⛰️Aquascaper
    Joined Aug 202626 posts121 pts★5.0(1)📍 Diamond Bar, CA
    Sep 5
    Excellent job! Thanks for sharing. This is all very helpful as I consider my new build. Now the exciting part, livestock! Other than the clowns, what fish do you currently have and what do you plan to add? Will you be adding all fish (new and old) at the same time?
    ▲ 0
  • @BackbayReef
    SCRM😎 Cool Kids🧠Reef Guru
    Joined May 2026265 posts1,033 pts★5.0(2)
    🔧 Build Contributor
    Sep 5
    Great job, dude! You are definitely more talented than me! As you know, I used to have the IM25 Lagoon - love this size, btw. I’m sure you will like this setup. Following along for the ride…
    ▲ 0
  • @janiners305
    SCRM😎 Cool Kids🌸Polyp Whisperer
    Joined Aug 202672 posts284 pts📍 Glendora, CA
    🔧 Build Contributor
    Sep 5
    Looks awesome!!! I can’t wait to see the rest of the journey!
    ▲ 0
  • @ktran
    SCRM😎 Cool Kids⚡SPS Slinger
    Joined May 2026161 posts683 pts★5.0(1)📍 Tustin, CA
    🔧 Build Contributor
    Sep 5
    Sick build. Super curious to see how that light will work for you. Maybe I should upgrade my 25ext to it too.....
    ▲ 0
  • @mescobar
    SCRM😎 Cool Kids🌸Polyp WhispererOwner
    Joined Aug 202629 posts155 pts★5.0(1)
    🔧 Build Contributor
    Sep 5
    @joeoliver wrote: Excellent job! Thanks for sharing. This is all very helpful as I consider my new build. Now the exciting part, livestock! Other than the clowns, what fish do you currently have and what do you plan to add? Will you be adding all fish (new and old) at the same time?
    The immediate live stock that will moved over will be the clowns, RBTAs, some RFAs, and a mini max carpet nem. Along with some various leathers, gorgs, zoas, and mushrooms. I also have some CuC, 4 sexy shrimp, pistol shrimp, and decorator crab that will join them. I'm thinking I'll move all the coral over first to get the rock work and placement situated. Then shortly move in the clownfish, this should limit their ability to bite me while working on the tank lol As far as new livestock, I hope to eventually add a tailspot blenny, banded pipepish, and possibly a possum or pink-streaked wrasse. I'd also like to get some nice ornamental macro algae, and maybe clam.
    ▲ 0
  • 12Next →
    Sign in to comment.